Blogs
How to lace up up your Nike Air Max 1 sneakers?
Do you get comments on your “lace job” or are you jealous of how dope sneakers look in other people’s photos? Do you only find the weirdest lace tutorials on the internet? Lacing seems complicated, but it’s really easy! As long as you know how and you know how to make it your habit. We explain the two best ways to tie your Nike Air Max 1s. With the perfect lace bow!
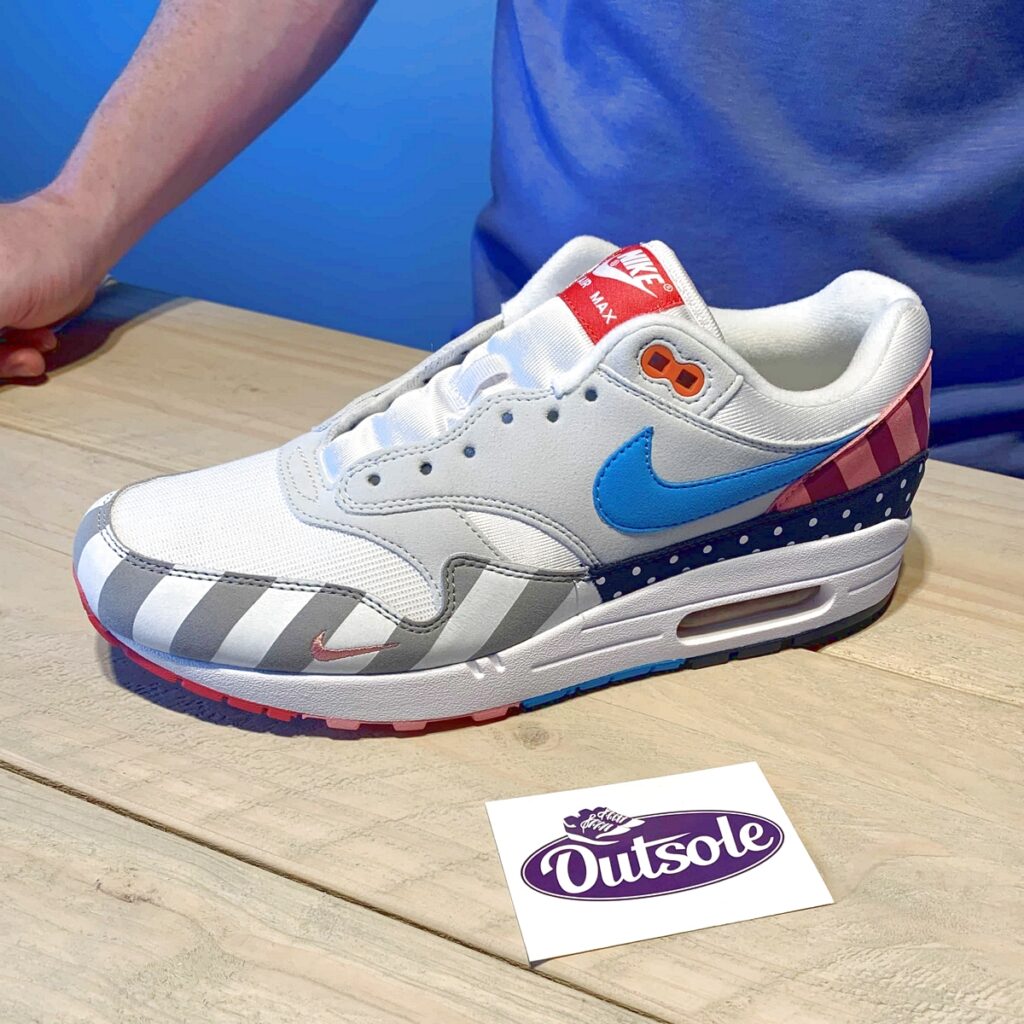
The perfect WOMFT
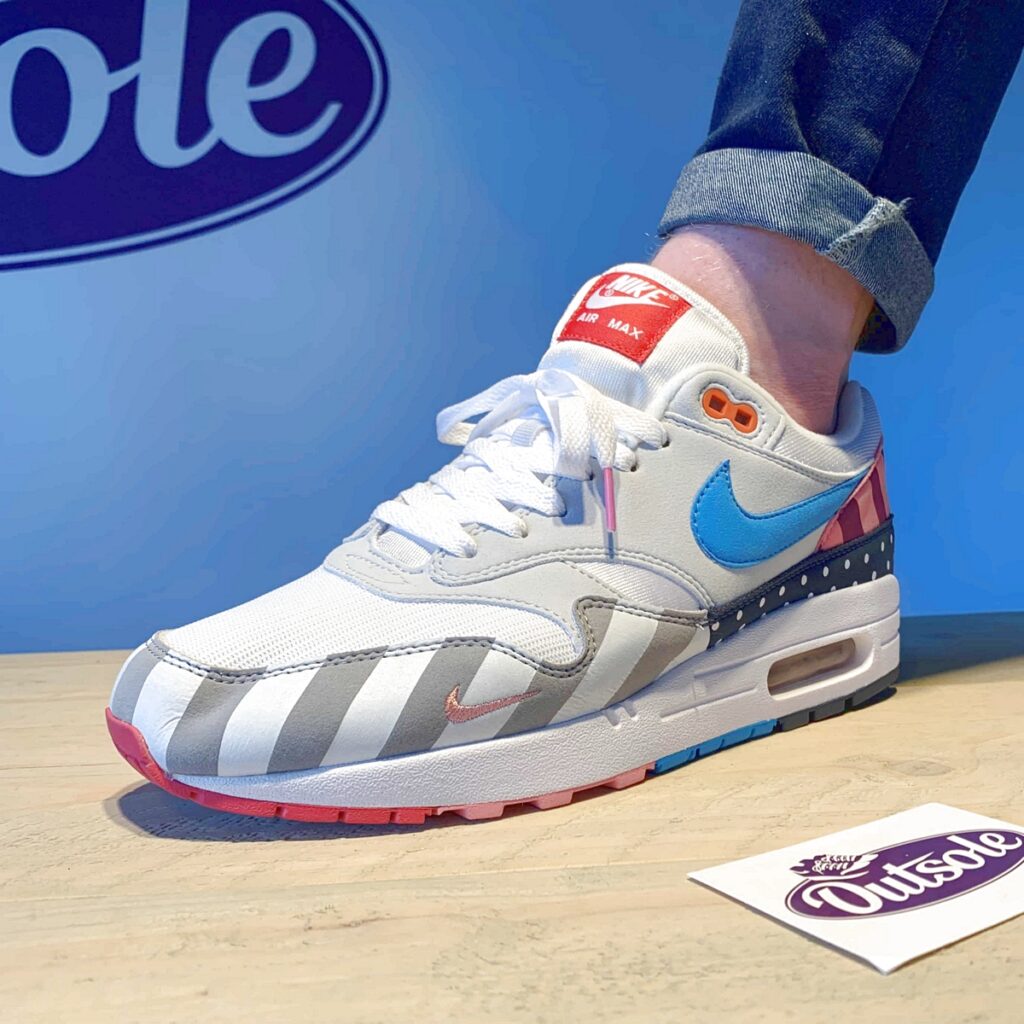
At Outsole we receive sneakers every day and we see hundreds of “wivah” or “womft” photos on daily basis. In addition, we also sell Nike laces online through our webshop. Based on what we see, we can say that not everyone finds lacing as easy. Or not necessary, so the laces are simply pushed under the insole. Such a shame! The lace job is the finishing touch to your sneakers. And that’s even an understatement. That’s why we write this blog: to help you out lacing your sneakers as good as possible. We help you create the perfect ‘womft’.
Womft = ‘What’s on my feet today’
Wivah (DUTCH) = ‘Wat ik vandaag aan heb’
Underneath vs. overhead
Are you afraid that lacing is really time consuming? With a good lace job you don’t have to lace up your sneakers every day. And even when it takes a minute extra, your pair of sneakers deserve the love. How beautiful your sneakers look is mainly determined by the lacing. Basically you can lace your sneakers in two ways: underneath (fabric laced) or overhead (we call that custom laced in this blog to keep it simple).
1. Underneath – Fabric laced:
Many sneaker listings state that a pair is still “fabric laced”. When a sneaker is offered fabric laced, it means that it is not laced by a person. In the past, sneakers were not laced more than three holes high from the factory. Today, sneakers are fully laced from the factory and many sneaker enthusiasts use this way of lacing as a lacing method. Fabric laced lacing is therefore the first way of lacing. This method is applied by Nike itself and is characterized by the fact that the Nike laces are laced up “from below”. We don’t think it’s wrong to lace up your sneakers in this way, but we go for a better alternative: custom laced.
2. Overhead – Custom laced
Instead of lacing underneath, you can also pull your laces overhead. We definitely prefer this way of lacing your Nike Air Max 1s or other sneakers. We are certainly not the only ones, as you see this way of lacing on many womft pictures. Besides that we find this more beautiful, it also laces a lot easier and above all faster. Lacing up overhead saves you frustration and time. For the perfect look, our advice is not to tie your laces too tight.
3. Other ways to lace up your sneakers
There are many videos on YouTube in which other lacing methods are explained. Crossed, not crossed, two laces in one shoe, we’ve seen the craziest ways to do so. Don’t get us wrong, we absolutely believe that you should wear sneakers the way you like them. But as far as these alternative lacing methods are concerned… Very cute for your daughter or niece of six of course, but for us as sneakerheads it is a real no go.
The second-upper lace hole
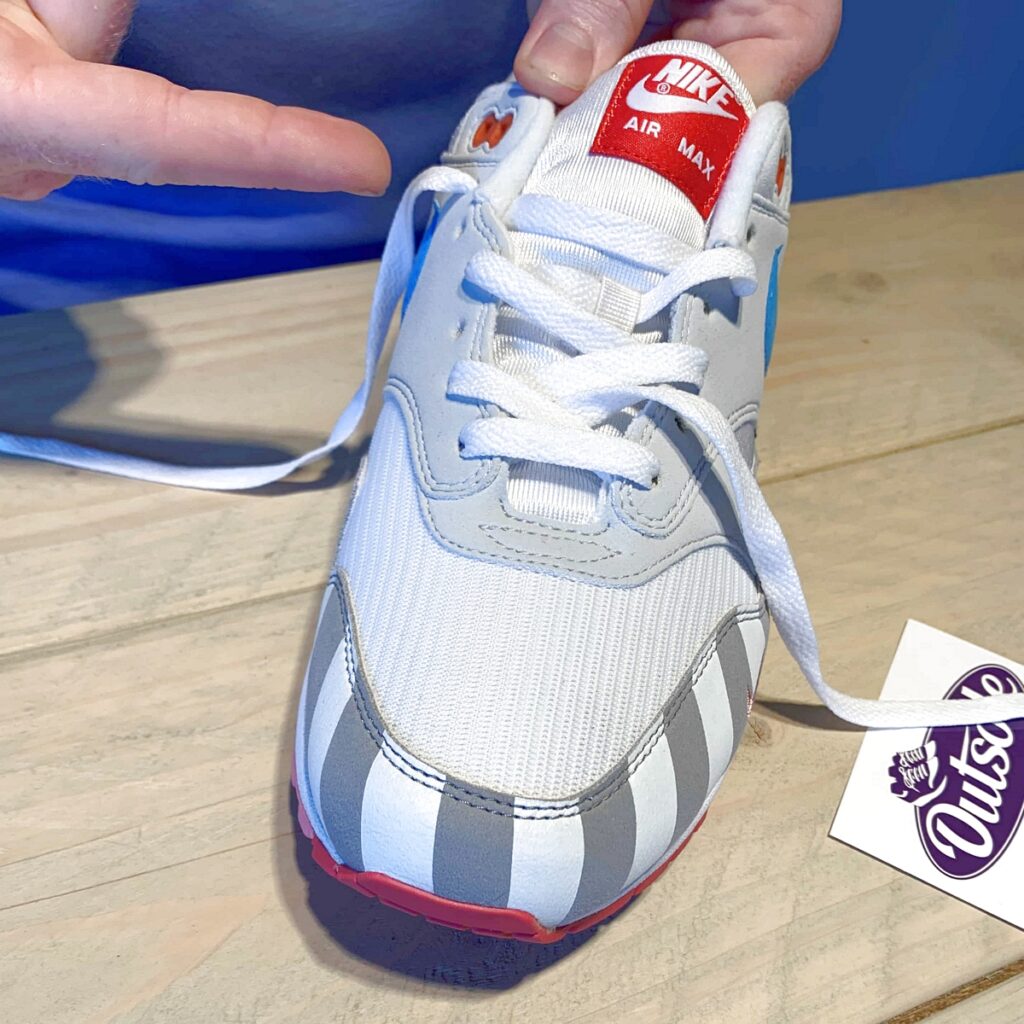
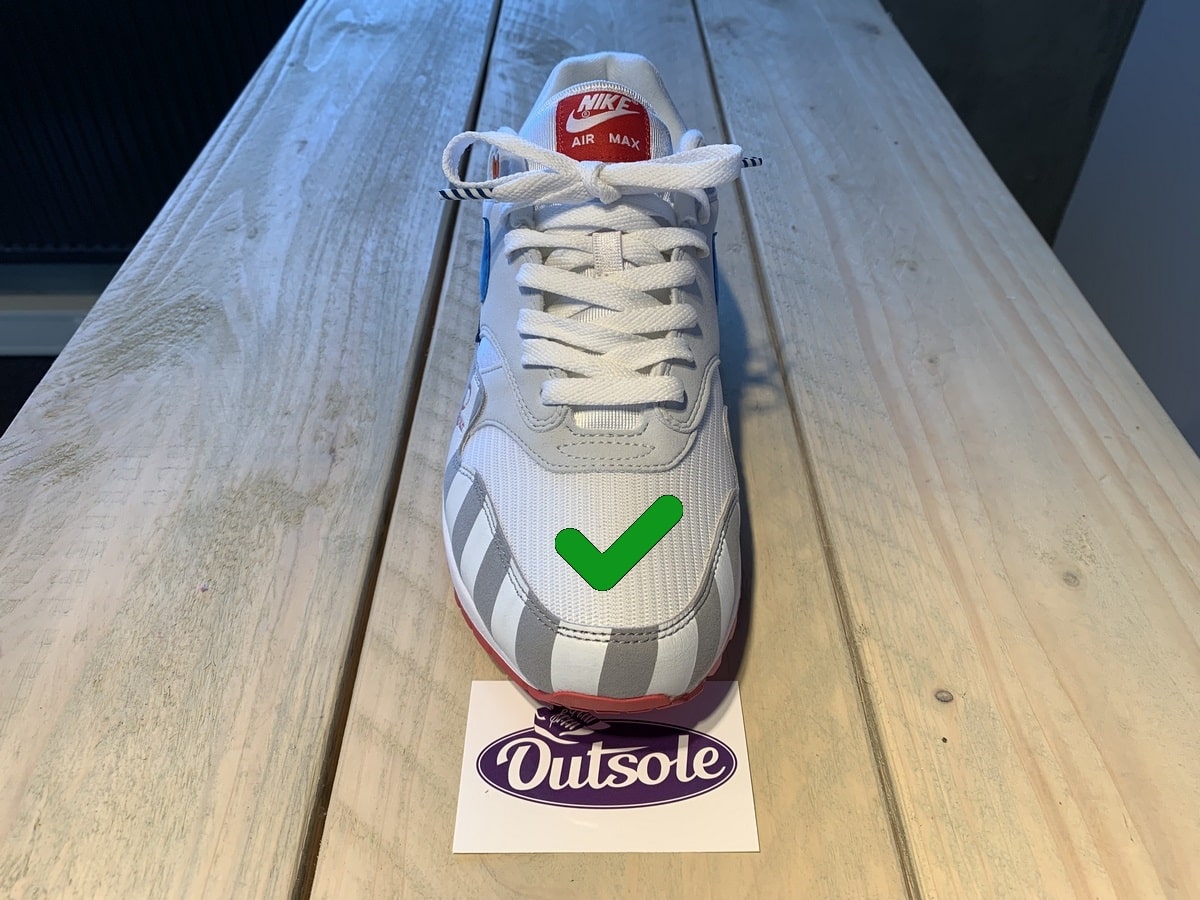
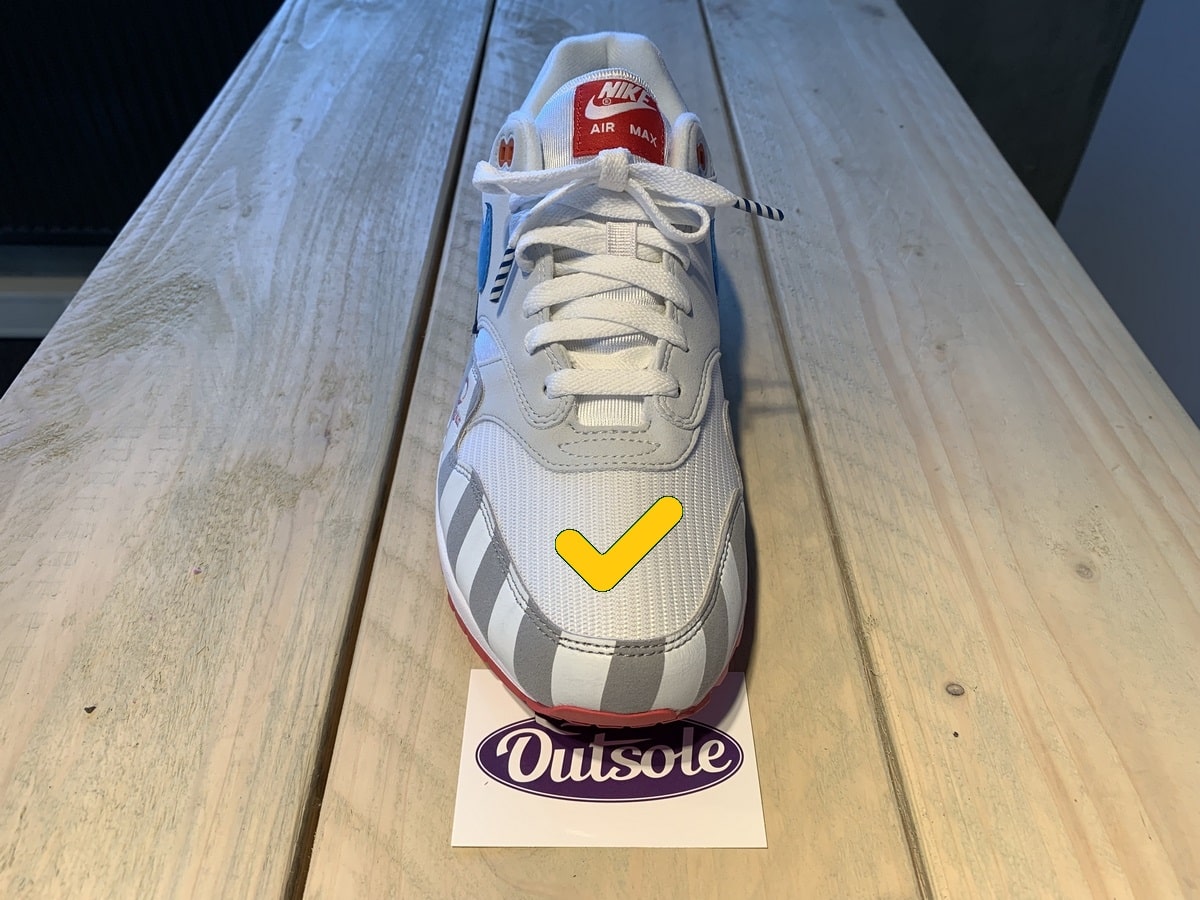
Up to the top lace hole?! As far as we’re concerned: no way! You lace up to the second-to-the-top hole of your Nike Air Max. The label on the tongue should be visible. That is why we always recommend using our 120 cm Nike laces. If the top hole is required for you to wear the pair well, we forgive you of course. Necessity knows no law. Sneakers have to fit well. For example, if your Nike Air Max is too loose, then lacing extra tight and using the top hole is a great solution. Consider using our longer 140 cm Nike laces in that case, especially with Nike Air Max 90s or BWs. Did you know that there are other and perhaps better methods for solving sizing problems? Read that in our blog about sizing!
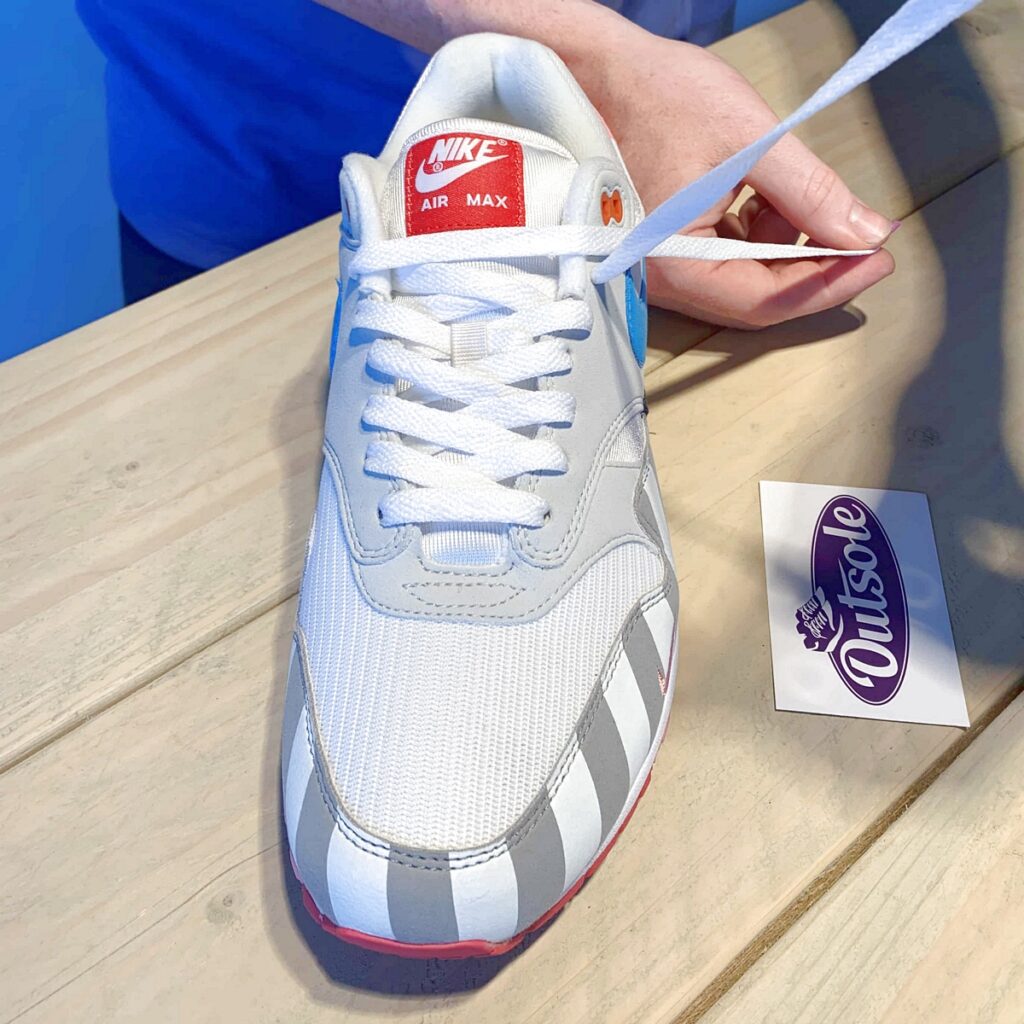
Tip: Do not forget to use the lace hole on the tongue. This will make your lace job look even cleaner and your tongue will stay in place better!
For example, for Nike Air Jordans, more lace variations are possible. It depends on which Jordans you wear and whether you want to create a baggy look with the Jordan laces, for example. We even condone it if you don’t use a loop. In that case, we recommend using our 140 cm laces for Mids and Lows and otherwise using the 160 cm Nike Air Jordan laces. Do you prefer to tie your Jordan laces up to the top lace hole? In that case, make sure take our 180 cm Jordan laces. If your size is smaller than US 6.6, make sure to pick 20 cm less than the recommended lengths in this blog.
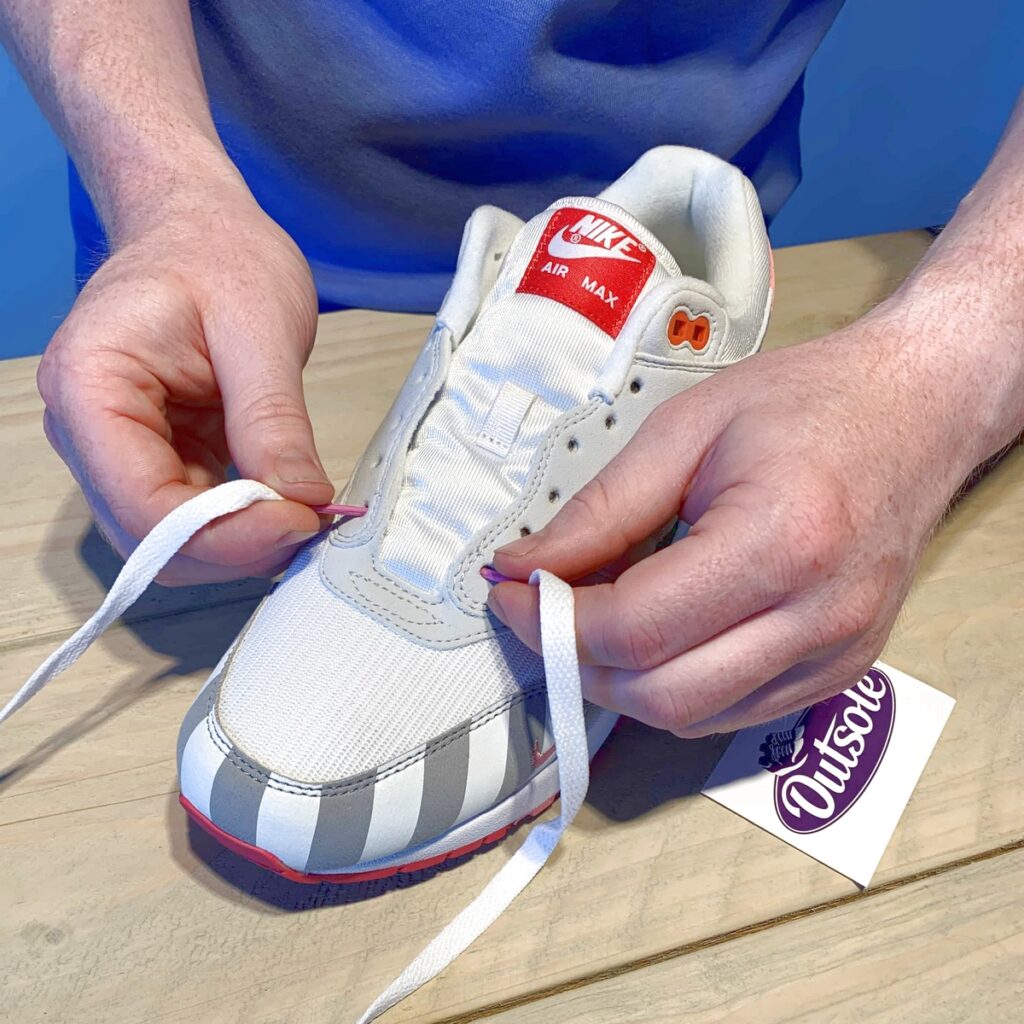
Tie shoelaces
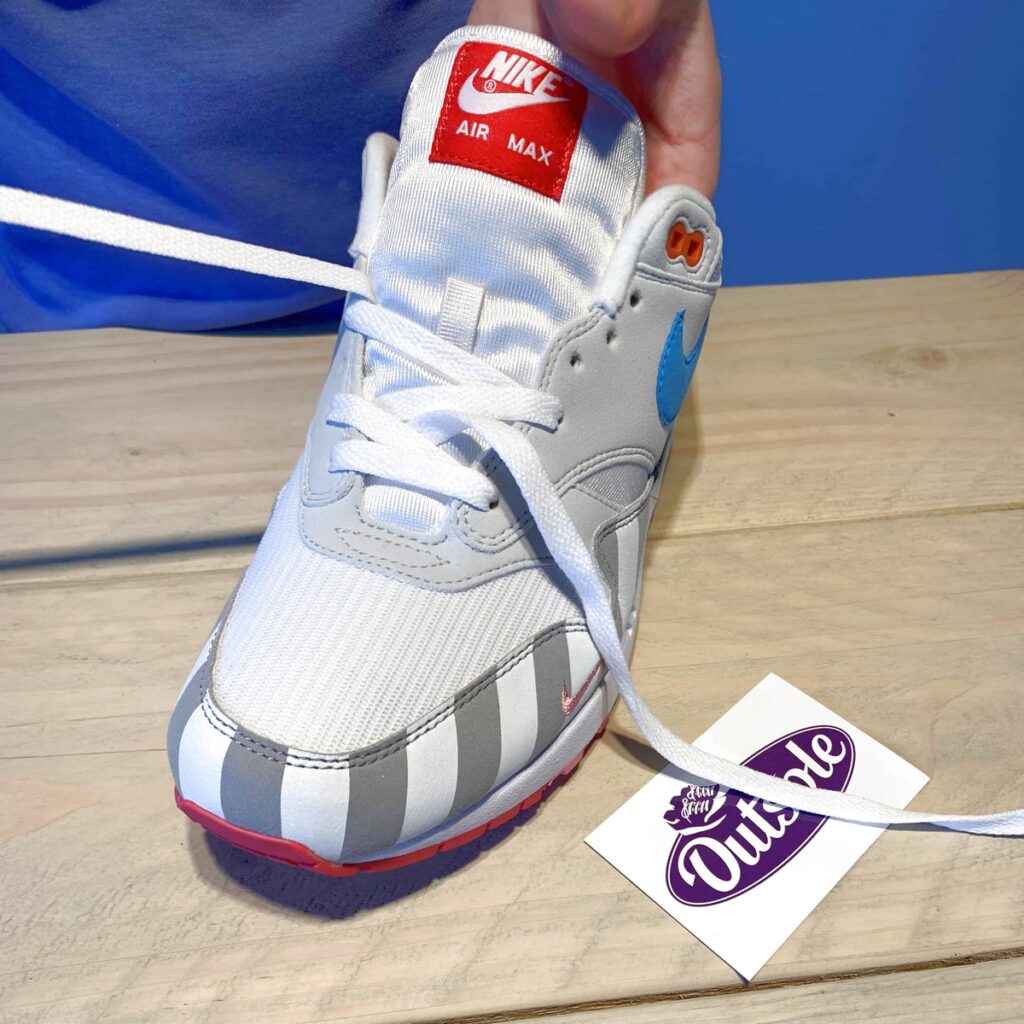
Most importantly: the shoelace bow. The finishing touch, the cream of the crop, the icing on the cake. Call it what you want, but a good lace bow will make or break your lace job. A lace loop that is way too long, a double knot or a loop that is always skewed… terrible! So what makes the perfect lace bow? That’s a subtle little bow that’s always straight. Our Outsole Nike Air Max laces are perfectly designed for your sneakers. By tying your laces in the right way, your lace bow is always straight. It’s so simple and yet many sneakerheads have no idea how to do this. We are therefore happy to explain it in the lacing tutorial below.
Roadmap
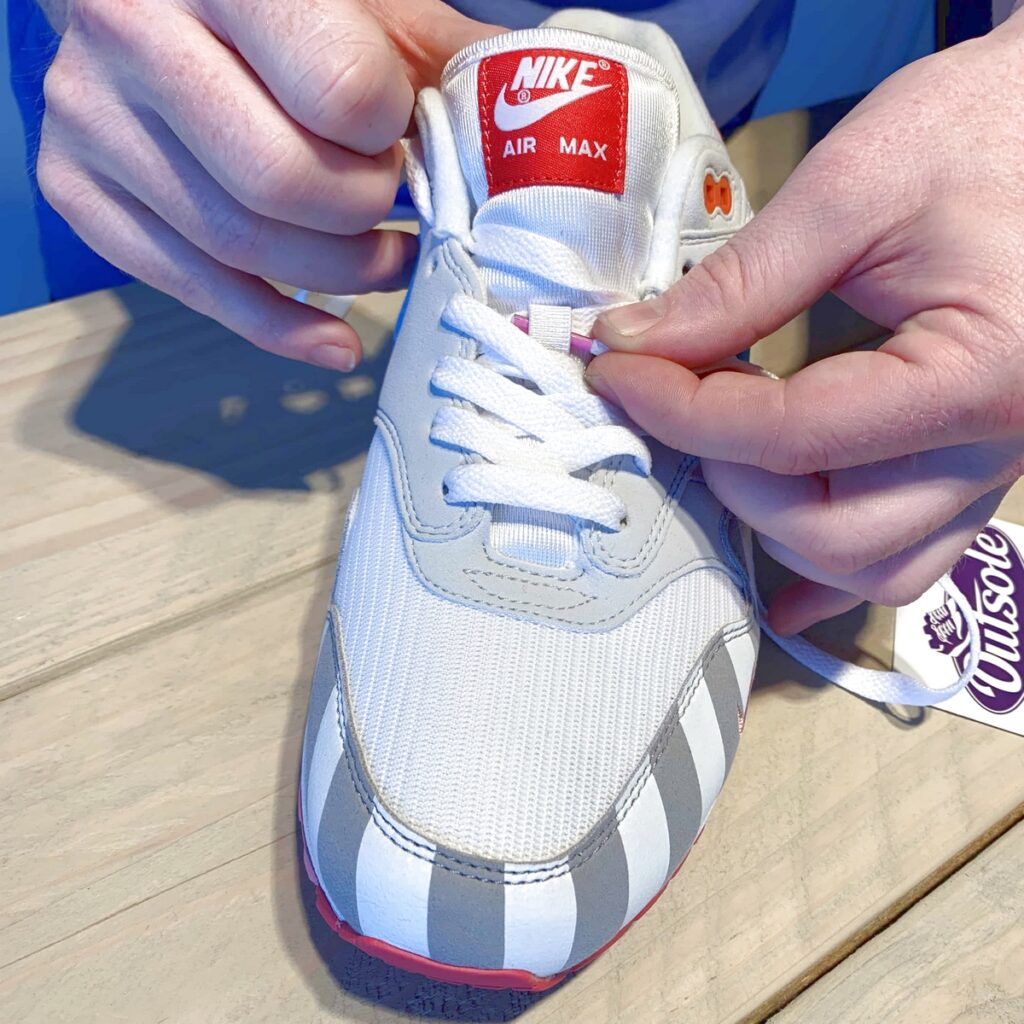
- Remove the old laces and clean the tongue if necessary.
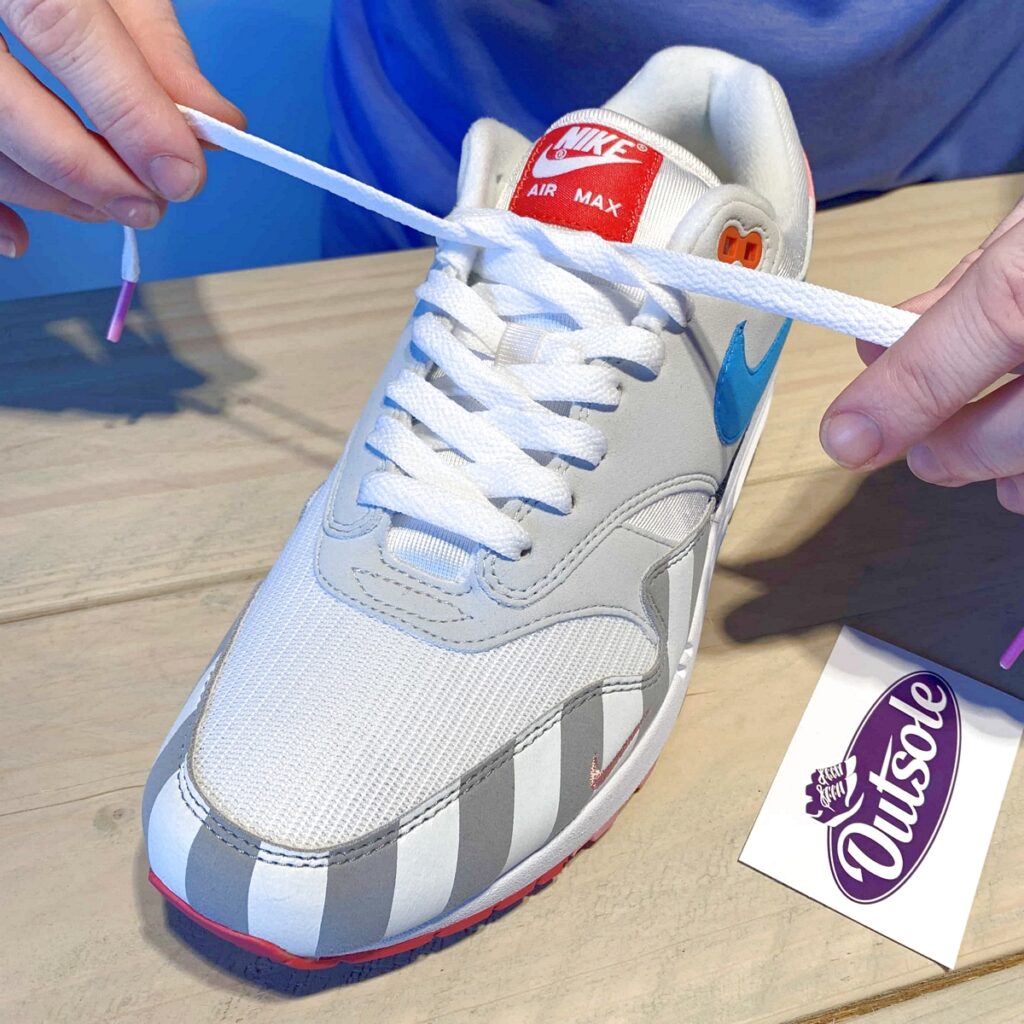
- Pass the laces through the bottom lace holes overhead.
- Always guide the lace with a finger to prevent it from twisting anywhere.
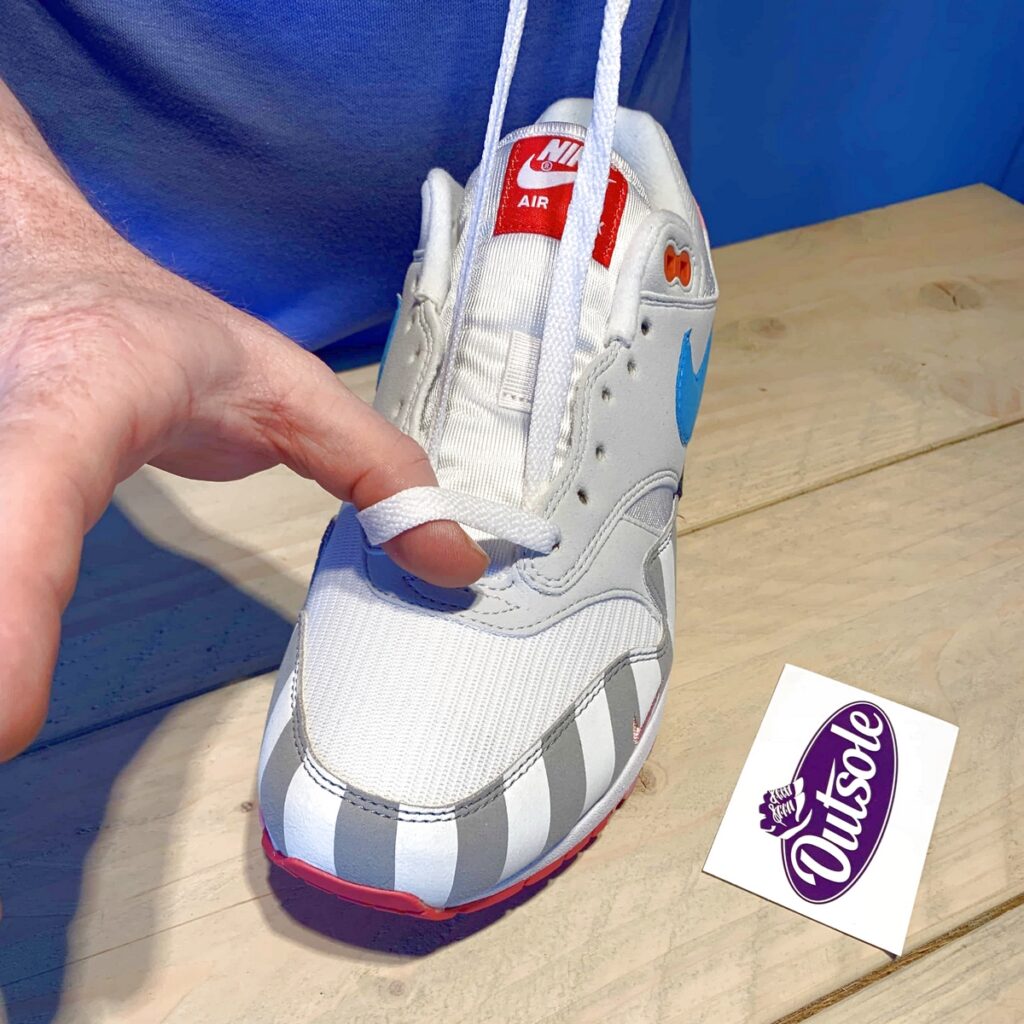
- Pull the ends tight so that the lace is the same length on both sides.
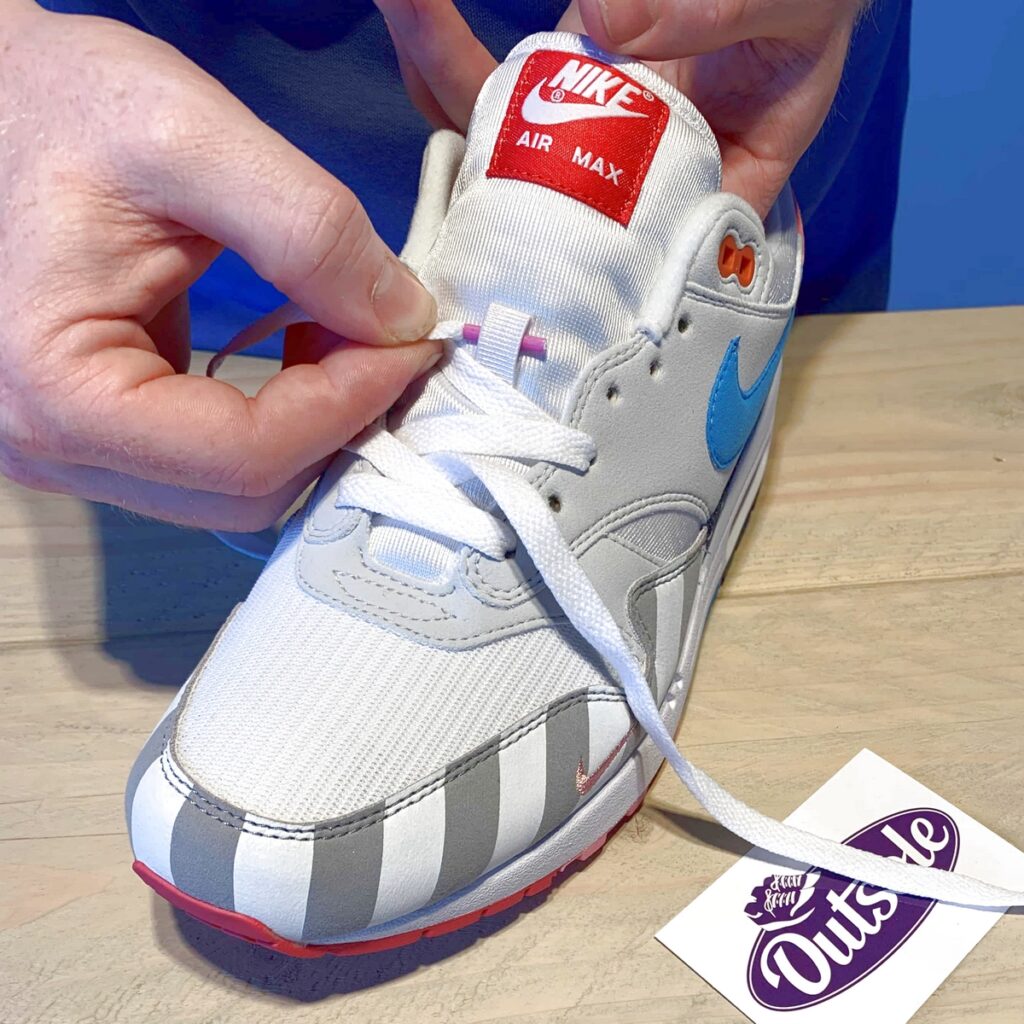
- Take one side of the lace and pull it diagonally at the top through the next hole.
- Continue lacing at the top with the same side of this lace, skipping one hole each time.
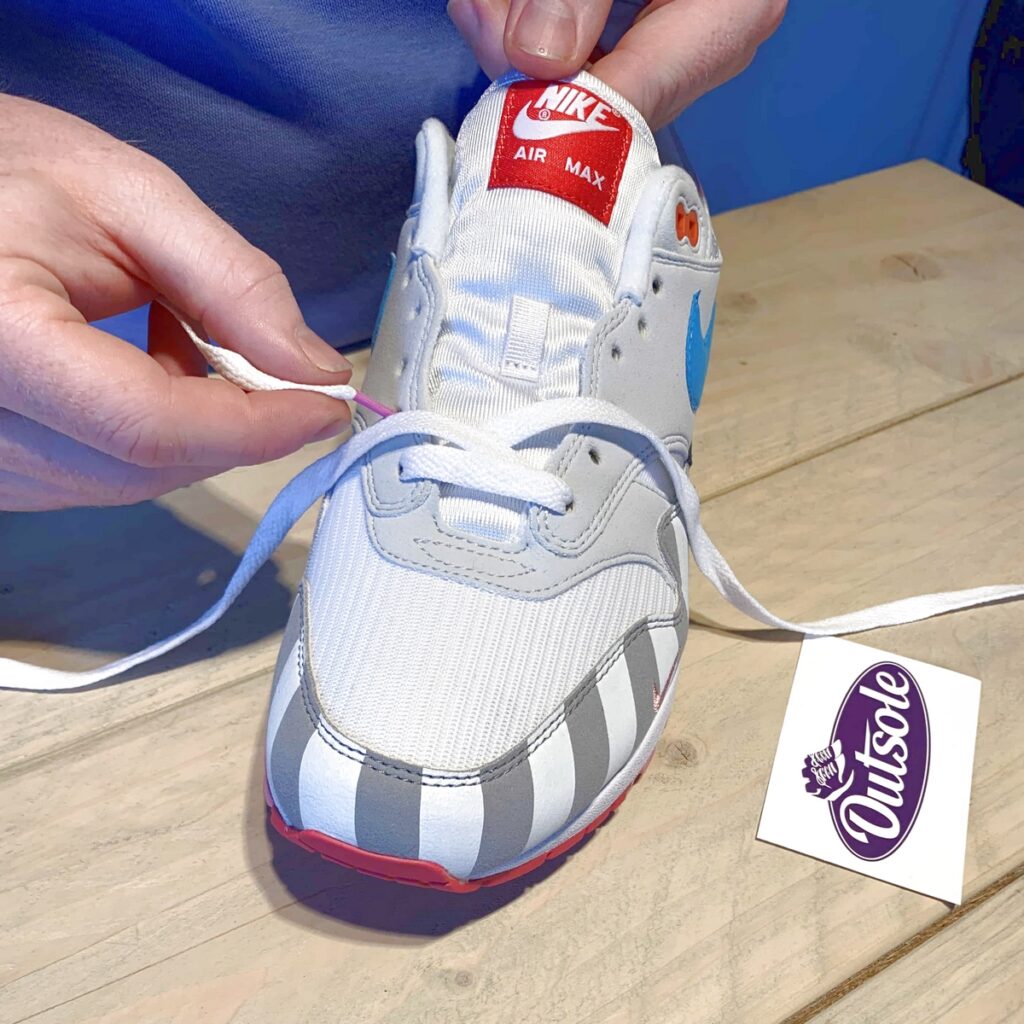
- Pull the lace through the loop on the tongue, making sure your lace doesn’t twist anywhere.
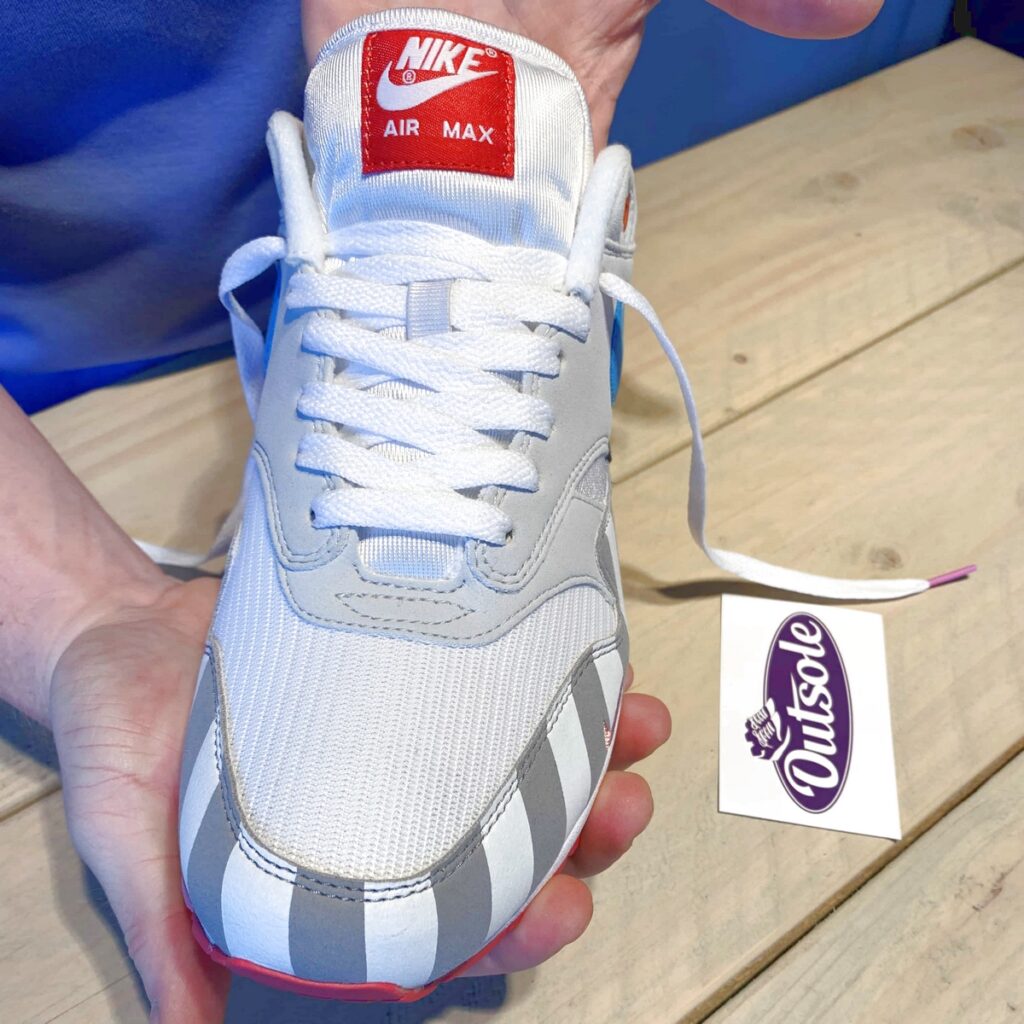
- At the second-highest hole you end underneath with your laces.
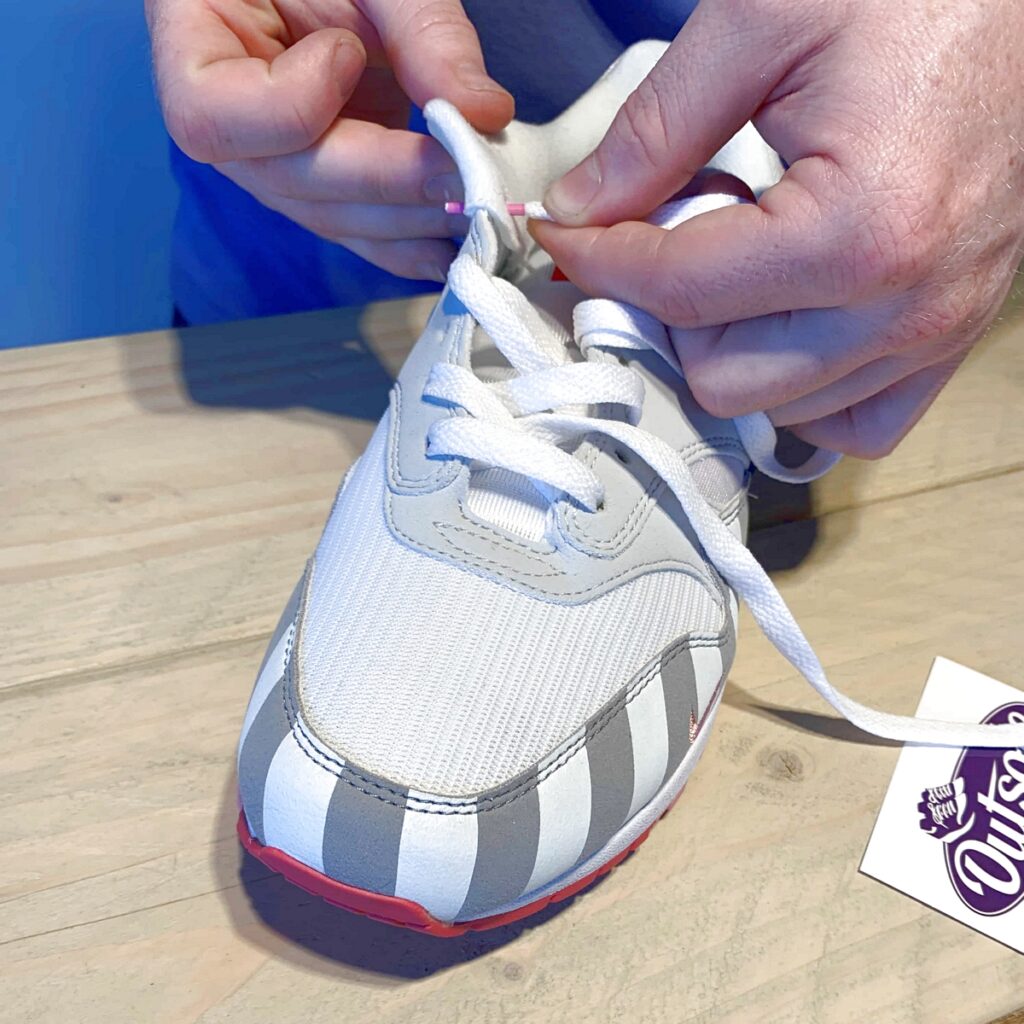
- Take the second side of the lace and pull it diagonally through the next hole. It doesn’t matter whether you pull it under or over the lace that is already there, as long as you consistently repeat the choice you make now (!).
- Continue the lacing and also pull this lace through the loop on the tongue.
- At the second highest hole you end underneath with lacing up.
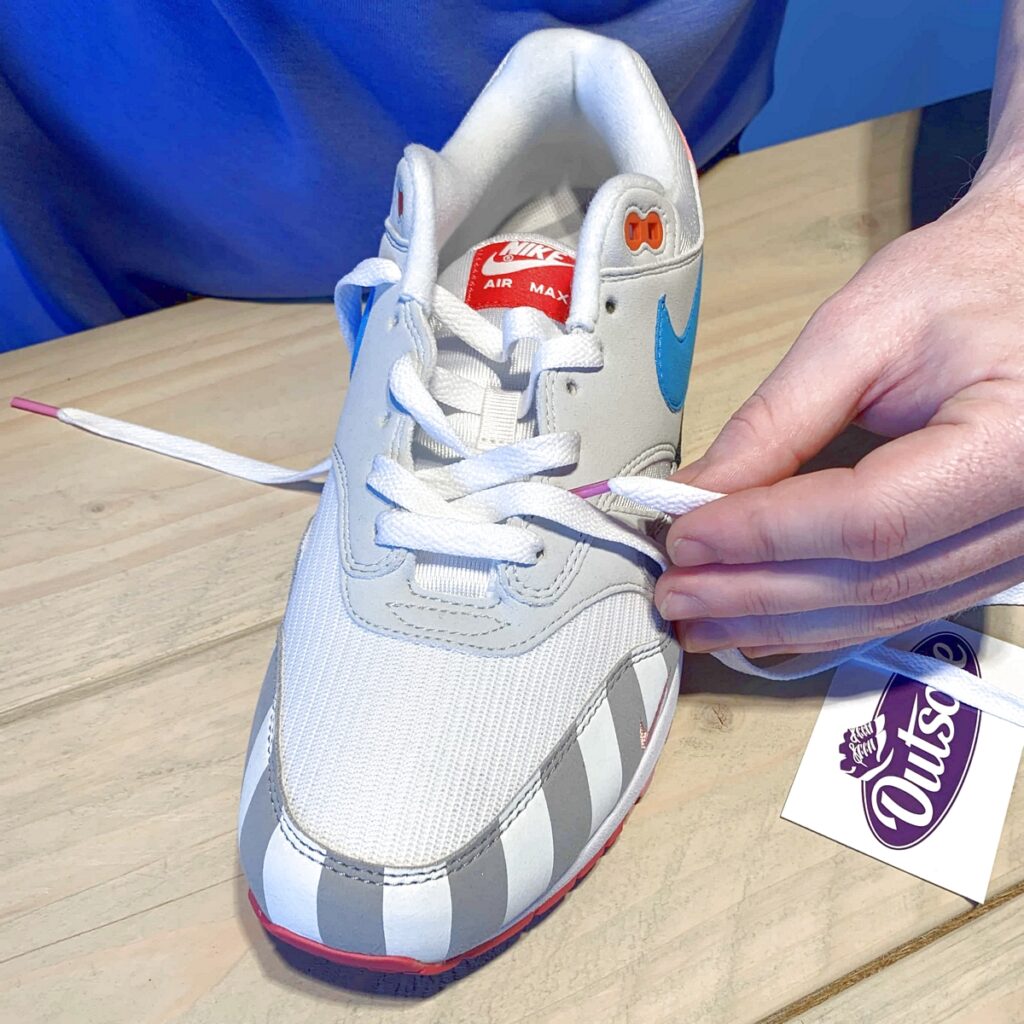
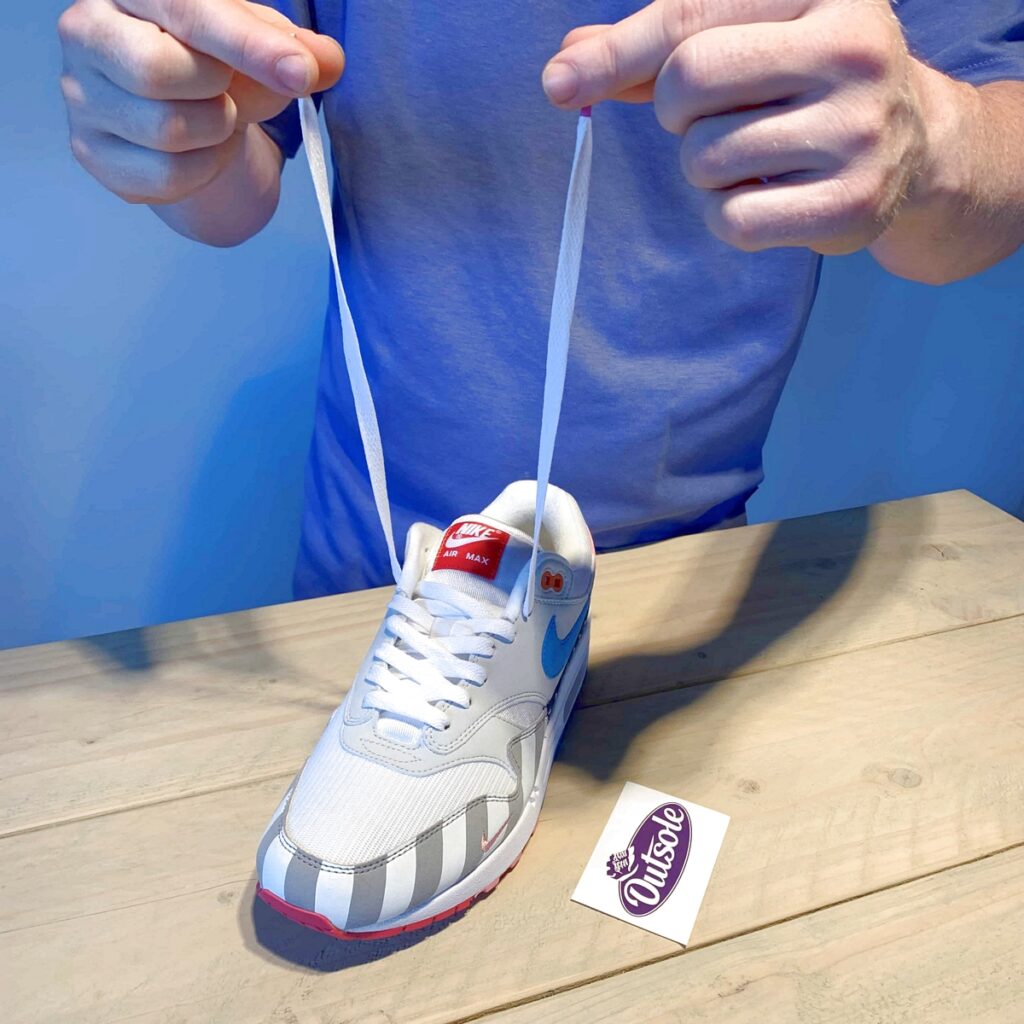
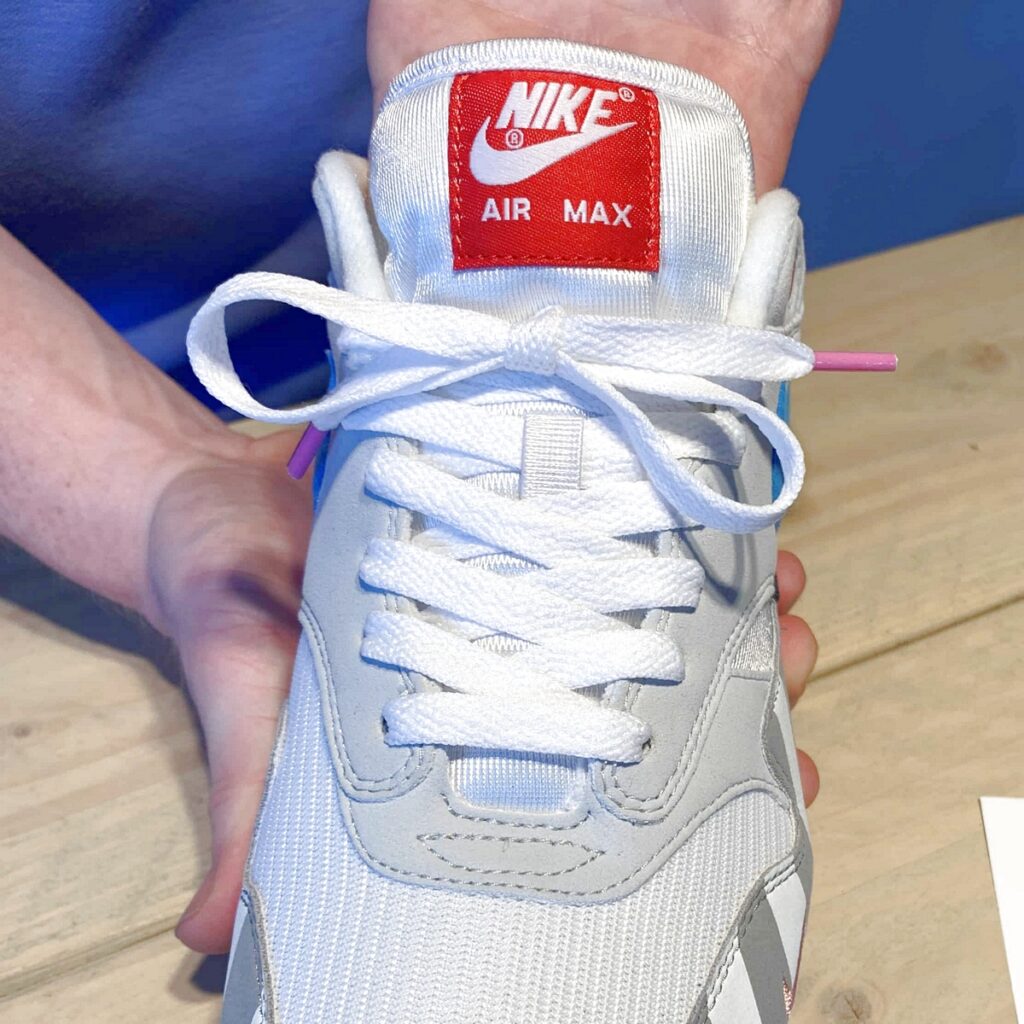
- The lacing is ready. Now comes the tying.
- Grab the two ends of the lace and check that they are the same length.
- Cross the laces by placing the end in your right hand behind the left end.
- Continue tying your laces as usual.
- Make a single bow. This way it will always stay straight!
To complete your pair of sneakers, just replicate the process for the other shoe. Ensure that the diagonal lacing mirrors either at the top or bottom. It’s all about that symmetrical style. Ready to step out in perfectly paired sneakers!
Did you know:
Do you also have that tongue problem, when it’s twisting and looks crooked? We all live with the question of how to prevent this with your sneaker laces. The answer: sorry, this is not possible. This problem is caused by the stitching, not the laces.